
Get Free SSL For Your Website With Cloudflare
Google has been working very hard to make the internet safer and has now begun to mark websites who don't have an SSL certificate installed but still exchange user data as “Non-Secure”. Therefore, it is now a must-do to serve your website data across HTTPS/SSL to secure your visitors’ data and also to show them that your brand cares about their security.
What is an SSL Certificate?
On most websites today, you would see that they begin with “https://” in the URL, which is due to the use of an SSL certificate on it. But that is not just for indication purposes, there are a lot more going on in the background.
Secure Sockets Layer (SSL) is a web safety technology that helps to establish an encrypted connection between your web server and the website visitor. This ensures that all data which are passed between the two is private and no-one in the middle has any access to it. Even if someone manages to tap the connection, the data will still be of no use to them, as it is encrypted end-to-end.
Coming back to the SSL certificate, it is a tiny file that comes together with a cryptographic key with your organization and domain details. It is now placed on the server to turn on HTTPS protocol. The browser and Operating system vendors work with SSL Certificate Authorities to also add the Root Certificates (from which the SSL certificate is produced) within their software so that the installed certificate can be authenticated and a secure connection would then be established between the web server and the end-user browser.
Why do you need to have an SSL certificate on your website?
While eCommerce websites, banking institutions have been using SSL for a very long time other websites are just starting to use it now. Apart from the main benefit of securing user information and prevention of a data leak, one of the major driving factors has been Google’s webmaster guideline. It states that SSL will be now be considered as a ranking factor in their search algorithm. This was announced back in 2014 and since then many websites have started moving over to HTTPS. So websites with an SSL certificate are bound to get a slightly higher ranking than websites without.
How to secure your website using a free SSL certificate?
The easiest way to get a free SSL certificate is to sign up and make use of Cloudflare, and below is a very detailed way to do that.
Step 1: Create an account on Cloudflare
Enter your information and then click on the ‘Create Account’ button
Step 2: Configure your website/domain
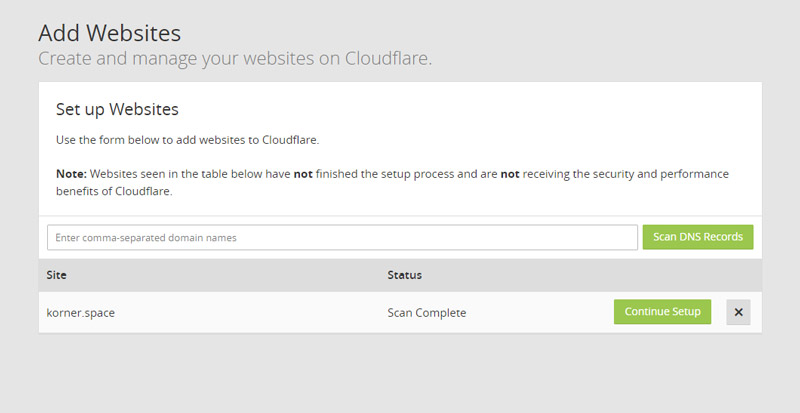
Add Website to CloudFlare to Scan for your domain DNS Records
Add your complete website URL and click on the Scan button.
CloudFlare will now scan your website. Click on ‘Continue Setup’ once the scan has been completed.
Step 3: Configure your Website DNS Records
Once the scan is done, you will now, see an orange cloud that is next to your main domain. That means the configuration is correct. Mail and FTP are bypassed by Cloudflare and should be showing grey clouds.
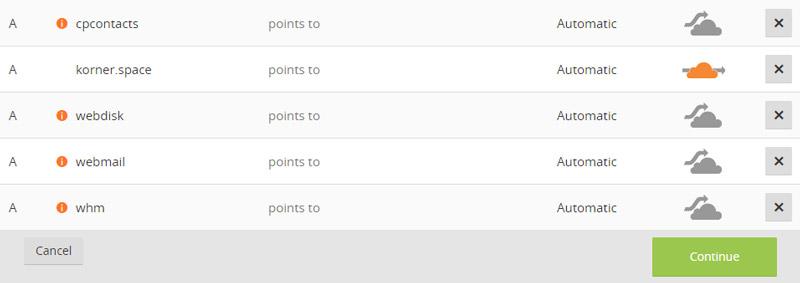
Ensure that your main domain has an orange cloud next to it.
If you see the primary domain of your site with an orange cloud, then just on the 'Continue’ button.
Step 4: Choose a CloudFlare Plan
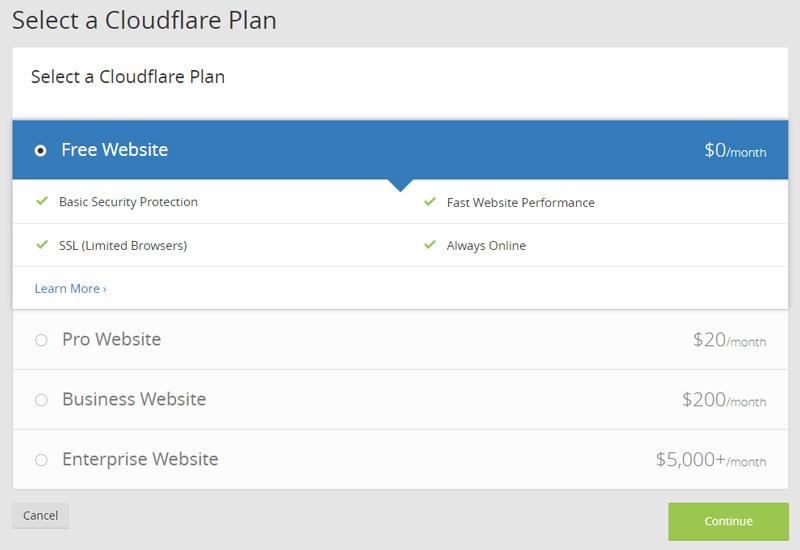
Since we want a free SSL certificate, choose the Free plan here.
For most websites, the Free Plan would be just enough. Just select it and click on the ‘Continue’ button.
Step 5: Update your NameServers
You would be required to point your NameServers to Cloudflare. To do this you would have to log into your domain registrar account, find the setting to change the NameServer to point to Cloudflare nameservers.
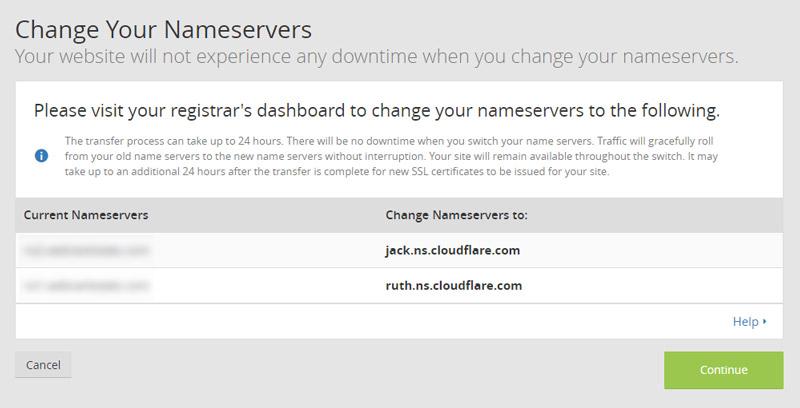
Delete the existing entries, and add the DNS records that CloudFlare provided.
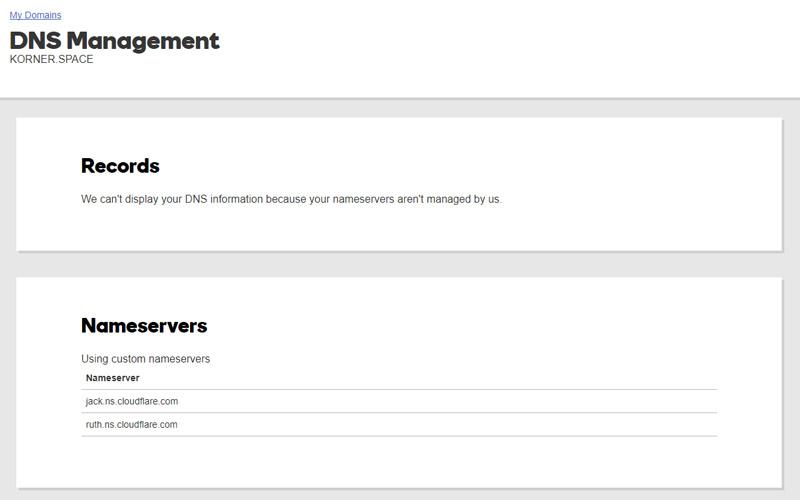
Once you have modified the NameServer to point to nameservers, come back to CloudFlare and click on the ‘Continue’ button. However, it may take up to 24 hours for the NameServers to fully work.
Step 6: Set up SSL for your website
While your nameservers are being set up, you can get to SSL configuration. Scroll over to Settings Summary and you would see SSL: Full. Click on Full and you will be redirected over to the ‘Crypto’ page.
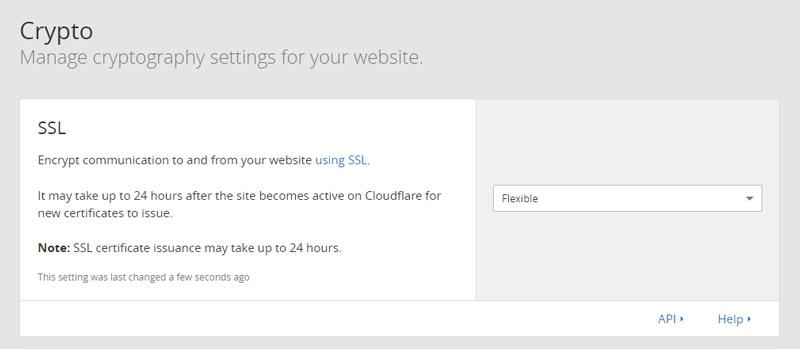
Beside the SSL option, there is a dropdown list. From there, select ‘Flexible’.
Step 7: Redirect traffic to HTTPS
This is the last step to follow in the configuration is to set up a page rule to redirect all traffic of your website over to HTTPS.
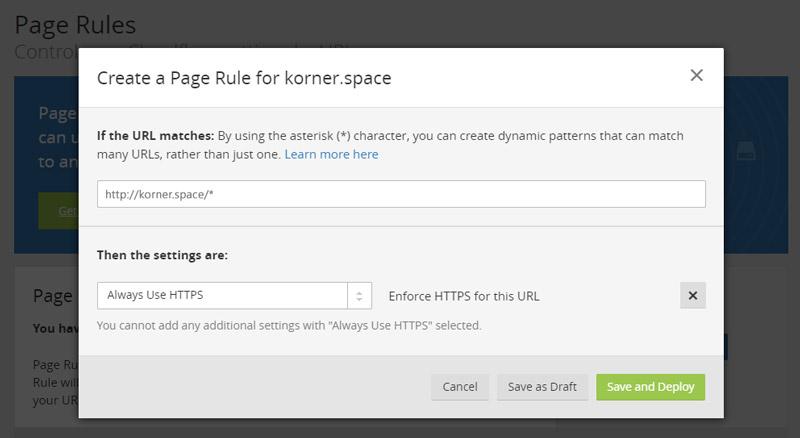
From the website page, click on Page Rules that are at the top of the page. Now we need to add a couple of rules here.
You need to add www.mywebsite.com/* and mywebsite.com/* separately, and for each of these URL patterns select ‘Always Use HTTPS’. One thing to note here is that this option will only be available once the SSL certificate is issued.
The configuration will take a few minutes to go through. Once done, you can then open any page on your website, and it will open on HTTPS.

